Showing posts with label audio engginering. Show all posts

Thursday, May 5, 2011

Why Do We Make Soundcheck. Part Two

Making it easier on junior engineers makes your band sound better.
Earlier today I went over the basic preparations required to make a sound check run smoothly. Now, we’ll get down to the nitty gritty of how you and the house technical staff can best work together to bring your audience a truly memorable and killer show.
Follow the procedure.
The venue engineers will guide you through the process of sound checking, but knowing what’s coming saves time, and demonstrating familiarity with the process provides reassurance to the technical team and the promoters.
The first step involves finding the peak level for each source, so that no matter what happens in the show, the channels won’t overload and will operate in their butter zone for the majority of dynamics levels. Thus, when the engies call for you to play, tell them, “OK, here come some peaks,” then really dig in and give themthe loudest thing you could imaginably play during your set.
For those using pedals, be sure to stage your gain such that turning on or off any given effect doesn’t cause any significant volume changes. For those using patches or samples, be sure all your sounds produce a fairly consistent level. Depending on your medium, normalizing or gently compressing your sounds in advance can help this tremendously. Start with a clean and clear tone or sound, and play long, resonant notes.
Once you’ve caught the engineers’ eyes, you can move on to step two, the tonal and textural stuff. With the input level in place, the engineers will start applying inserts and EQ to the channel, so this is the time to begin playing throughout the full range of the instrument, loud and soft, high and low, staccato and legato, clean and effected. [Vocalists who use effects, please see NOTE #1 at the bottom.]
When this process of level and tone setting has been iterated across every source, you’ll move on to the third step, building your monitor mixes. The monitor engie will ask each player in turn what (s)he wants in his/her wedge. When answering, try to follow the same order of channels you just worked through, indicating for each source how loud or “forward” it should be in the mix. If one or two sources are significantly more or less crucial to monitor than the rest, be sure to note that after providing the complete list of what you’ll need to hear. For example:
• A singing guitarist might say: “I’d like just a touch of kick and snare, a moderate amount of bass, a bit of my own guitar, a fair amount of the other guitar, and plenty of keys and my voice. The most important thing for me to hear is my own voice and the keyboard. If you have to cut something, pull the drums out.”
• A drummer who also plays a sample pad could reply: “I don’t need any of my kit, but please give me a bunch of bass, a middling amount of guitars and keys, a ton of my sample pad, and just a little vocals. The most important source for me is my sample pad, and the vocals can go away if they have to.”
Once the monitor engie has basic mixes up for all the wedges, the band should play and loop a part of a song that uses the most sources possible. [Why? See NOTE #2 at the bottom.] While continuing to loop the part, each member should catch the engie’s eye, one at a time, to fine tune his/her mix.
When it’s your turn, point at a source, then point up or down, then point at the wedge where you want the change. This says to the engineer, “I want source in mix.” Keep looping the part until all the monitor mixes are to taste. A smile and a nod or the “OK/perfect” hand sign indicates to the engie that your mix is to your liking. Repeat as necessary until you’ve covered all your sources.
You may have to tolerate some feedback during your check while the engineers maximize their gain staging and chase down trouble frequencies. Keep playing through the feedback [Again, see NOTE #2.] so the engineers can find the ringing frequency amidst the dynamic and shifting signal. Realize that although standing over a ringing wedge is obnoxious and even occasionally painful, it certainly beats gambling on feedback returning mid-show, so taking a few extra minutes to properly and sufficiently ring out a wedge is always time well spent.
When you and your bandmates are happy with your monitor mixes, it’s time for step four. Stop the loop you’re playing, and tell the engineers that your mixes are good and that you’re ready to play a song and check the house. Pick a couple songs from your set and play them from beginning to end, without stops. [See NOTE #2.] If your wedges need further tuning, signal the monitor engineer while you play.
After a couple songs, ask the front of house engineer if (s)he has heard enough and has the mix dialed in. Once the FOH engineer is happy, ask to play one more tune so the band can hear the sound in the house. Take turns, one band member at a time, walking through the house. If you have any requests for the FOH engineer, now is the time to make them. When every band member walked the house, and the band and engineers are all sufficiently satisfied, then the check is complete.
If your gear must be moved before your set, follow this procedure immediately, well before you consider heading to the green room or the bar or to dinner:
• Mark the onstage position of your gear, using 2-3” strips of tape placed in right angles at the corners of each piece of gear, including mic stands and stage monitors. Using bright and uncommonly-colored tape helps these “spike” marks show up under low stage lighting and allows for your setup to be easily distinguished from other acts’.
• Once the positions of all your gear has been spiked, carry or roll your gear from the stage to your cases at side of stage. Don’t bring your cases to your gear, as that, as before, both doubles the amount of carrying you have to do and screws up the backline staging occurring both onstage and next to it. Start with the delicate items (guitars, cymbals, electronics, etc.) and work towards the rugged stuff (stands, drum hardware, amps, etc.), all the while making sure that the gear will be accessible in the reverse order from side of stage come show time, so the last things to get uncased before your set are also the most delicate. This protects your gear as much as possible and allows for a quicker changeover later on.
• If you are sharing any of your own gear with other bands, be sure that it’s properly labeled and placed somewhere immediately visible to them when they arrive. If you aren’t sharing anything, carefully remove every last piece of gear you care about; an unlabeled power strip or 1/4″ cable or hi-hat clutch left on a stage quickly becomes the property of whomever picks it up.
• Do a quick “owner’s walk” of the stage to be sure you’ve collected every last thing you brought with you. Once this is done, enjoy your break! The engineers, not to mention the bartenders and waitstaff and barbacks and management and security and promoters and bathroom attendants, usually don’t get such a break, so saying thank you and shaking their hands on your way out, as a demonstration of your appreciation for the work they performed, is always a welcome and valued show of respect.
NOTE #1: Unless you are using very particular, obscure, and uncommon effects, you will be much better off by letting the engineers use their house effects. Reverbs and delays are ubiquitous and the engineer will likely put some on your voice even without you asking.
Unless you are running an advanced real-time autotuning rig, or absolutely have to punch in a flanger at only a few crucial moments in a couple songs, or have a calibrated and road-proven harmonizer that needs different settings recalled between each song, let the engineers handle your effects. Otherwise, you’re stuck with the inferior preamp (if there even is one) in your unit, and the monitor and FOH engineers’ hands are severely tied since they can’t separate your vocals from the effect in the channel, meaning the effect will carry into any monitors and submixes, will throw off any inserts and EQ on the channel, and will, sometimes drastically, lower the gain before feedback. Your other option is to pickup a quality mic splitter so that you can send two channels to the engineers, one clean and one effected. Thus, the clean channel hits a proper mic preamp, inserts, and EQ before any effects, meaning both your monitor and FOH mixes will be cleaner, more flexible, and deliver more gain before feedback.
NOTE #2: An engineer cannot fix or adjust something that isn’t happening or being played, so stopping a song to ask for an adjustment is usually completely counterproductive. Instead, keep the tune going and ask over a vocal mic, loudly if need be, for what you need. Alternatively, or if you need something during the show, just catch the engineer’s eye (as any engineer worth their pay will look across the stage periodically, just like a good driver scanning his/her mirrors), and indicate what you need with a couple hand signs. If there is a monitor desk at side of stage, you can also always walk over to talk to the engie, so long as you keep playing. Remember, if in the process of dialing in a mix, an engineer doesn’t want to hear something, they can always mute the related channel, but if they need to hear something when you’ve stopped playing, nothing can progress.


Read more: http://ilhamnurulresources.blogspot.com/#ixzz1LQRLC9zB

Why Do We Make Soundcheck. Part One

One of the single greatest indicators of a band’s degree of experience, expertise, and general savoir-faire is the manner in which it conducts sound checks. So for those of you looking to take a simple step towards professionalism, or for anyone who prefers eating, sleeping, showering, and hitting on that cute bartender to playing quarter notes to an empty room while feedback swirls around you like a class three tornado, I offer these five bullet points on how to perform a painless, efficient sound check.
First, the basics:
Send all relevant information ahead of you.
The minute your show is booked, you should send your rider and contract to the promoter and venue. Ask the venue, in writing, to forward your rider to the sound and lighting engineers. When in doubt, include more, not less, information: you can never be clear or specific enough. By seeing your rider well in advance, the venue crew can better prepare for your arrival and save crucial time going over basic requirements. Riders should include, at the very least:
• Stage Plot: a detailed picture of the position of all performers, instruments, monitors, and power drops. Drawing it on a bar napkin with a crayon does not count; use any word processor that can draw shapes and lines and save the image as a JPG.
• Input List: a complete account of every input source, including all mics, DIs, and wireless systems. Just about any engineer you will meet will appreciate you following the industry standard convention of channel/source order, so stick with that unless you have a really good reason not to.
• Technical Requirements: a description of what, at minimum, constitutes an acceptable sound system and backline. If you need to clear 1200 decibels SPL, or your drummer must have a 62″ plasma subwoofer to accompany his monitor, or your keyboard must be a Chrysler Grand Caravan, or you’re sponsored by SlimJim and have to use one of their mics, or the system must respond up to microwave frequencies, this is where to say so.
Extra Credit: Send sound files along with the rider. This lets the engineers hear who you are and what you’re about. It also provides a reference so they know if their mixes are hitting the mark. If you have decent audience recordings of any shows you think were mixed particularly well, those can be of great use to an engineer, in addition to your studio tracks. Similarly, sending photos or video of lighting you’ve enjoyed in the past helps the lighting designer plan and program his looks.
Bring complete instruments.
Cables, rugs, power strips, picks, sticks, mallets, bows, reeds, and tambourines are all part of your instrument: a guitarist without a pick isn’t a guitarist, a drummer without a rug isn’t a drummer, a keyboardist without a power cable isn’t a keyboardist, and so on. If you need it, and the venue hasn’t guaranteed you, in writing, that it will be there, then bring it. In fact, bring two. In general, unless otherwise specified by a contract, musicians should bring, at the very least:
• Drummers: sticks, cymbals, snare, felts, multitool, drum key, and hi-hat clutches to fit various diameter stems. If you’re bringing a kick drum, then you need to bring a rug. Having a spare kick pedal and extra cymbal stands around never hurts either.
• Guitarists and bassists: picks, power strip, 1/4″ cables, change of strings, multitool, strap, 9V batteries. If you’re savvy, you also travel with at least one spare 1/4″ cable, one spare power strip, one spare IEC cable, and a bunch of 9V DC transformers.
• Keyboardists: stand, power strip, 1/4″ cables. Really slick guys have extra 1/4″s and power strips, as well as redundant power cables for their keyboards.
• Computer Musicians and DJs: table or stand, power strip, 1/4″ cables. If your outputs are XLR, then don’t sweat the 1/4″s. If they’re TRS, bring TRS-to-XLRmale adaptors. Again, spare 1/4″ cables, power strips, power supplies, and output adaptors are all good to bring along.
• Brass & Strings: reeds, bows, rosin, change of strings, and stands are all requisite. Spares of all are a bonus.
• If you use music stands, bring your own clip lights with extension cords and spare bulbs even if there are stands at the venue.
Extra Credit: EVERY player, regardless of instrument, should bring an extra 1/4″ cable, power strip, pack of picks, pair of 5A drumsticks, roll of gaff tape, Sharpie, pen, multitool, and zip ties in an “emergency kit.” All of this fits in a small bag and weighs just a couple of pounds, but it’s well worth it for the gloating you can do after you save your idiot bandmate’s ass when he forgets something crucial.
Extra Credit: Bring your own vocal mics and DIs. Professional quality gear please – no RatShack, no B******er, no PG series, no cheap/unreliable/flimsy stuff. This affords you the delight of not having to taste the mouth of whomever last used the venue’s mics, and it means you’ll always have spares on hand in case something goes down during the check or the show.
Load in intelligently.
Place your cases to side of stage so the full stage is available for gear and cable runs. By bringing your gear from its case at side of stage to its onstage position, you both keep from cluttering the stage right when it needs to be its cleanest for cable running and dressing, and you save yourself the trip of carrying an empty case offstage. The exceptions to this rule are amps and cabinets in top-over-style cases. Leave the top at side of stage and roll the amp into position on the bottom/caster plate. (Don’t forget to lock your casters once your amp is in place!)
Start by helping each other move the large and heavy objects like drums and amp cabinets. Once all the big stuff is staged, break off and finish the details of your rig by yourself. Any pedal setup involving more than two pedals should live attached a pedalboard, with its patching and power configured for plug-and-play readiness.
Extra Credit: Use exclusively ATA-rated hardcases in standard sizes. Such cases’ dimensions, durability, and recessed hardware make packing, stacking, and moving much easier. ATA-rated cases also meet the most demanding specifications for the transport of delicate materials, so your gear travels as safely as possible.
Be on time!
It might sound obvious, but lateness screw up dozens, hundreds, or even thousands of people’s days. It pushes back all the other checks at least, and the door and show times at worst. If you’re lucky enough to be the headliner, you will likely check first; checks usually run in the opposite order from that of the show, so that when the first opener finishes their check, everything is set and ready to go come show time. When other acts are late or run long at check, it’s almost always the poor opening act that suffers the most, as it’s ultimately their check that will get shortened, or even cut entirely.
Extra Credit: Be 30 minutes early. If the venue is open, load your gear to side of stage, and begin prepping the gear, making sure to leave room for any other acts’ backline. If the venue is closed, line up your gear neatly by the stage door, big and heavy stuff first, small stuff last.
In the next installment, I’ll go over the nuts and bolts of how to make the most out of your check once you step on stage.


Read more: http://ilhamnurulresources.blogspot.com/#ixzz1LQQzDK1w

Tuesday, February 22, 2011

Antara irama lagu dan kebebasan bermuzik.


Ada muzik yang datang dari Indonesia ke Kuala Lumpur, dari Amerika ke Johor Bahru, dari Jamaica ke Kedah dan dari Eropah ke Pulau Pinang. Ada juga yang datang dari padang pasir, dan ianya di kenali sebagai muzik dari padang pasir. Setiap masyarakat di dunia ini memilih muzik sebagai satu bahan untuk pentaskan budaya masing-masing di samping menyampaikan ideologi-ideologi berteraskan pemahaman masing-masing, apa yang dipercayai dan apa yang tersirat antara mereka. Jelasnya muzik yang berteraskan fahaman cinta di terima ramai seluruh dunia amnya.
Jika di Indonesia muzik Dangdutnya, di Jamaica dengan muzik reggae mereka. Itu pilihan masing-masing. Di Amerika, muzik digunakan sebagai pentas terbaik meluahkan apa yang tersirat.

P1010331-FB
Di Kedah pula, konsert yang melibatkan muzik rock, reggae, pop dan dangdut adalah tidak dibenarkan. The Star melaporkan Kerajaan Negeri Kedah melaksanakan satu formula untuk mengelakkan gejala sosial yang telah lama ada sejak dari dahulu di Kedah dan dengan itu konsert yang melibatkan muzik rock, reggae, pop dan dangdut adalah tidak dibenarkan.
“We are currently formulating a comprehensive guideline for concerts. “Until then, concerts of such nature are banned,” State executive councilor Dr Ismail Salleh, taken from The Star Online 29 August 2008.
Dari sini, kita melihat bahawa sebarang unsur-unsur muzik tersebut sesama sekali tidak dibenarkan. Adakah artis yang membawakan aliran muzik-muzik tersebut yang tidak dibenarkan untuk membuat persembahan, atau muzik mereka, atau jika artis yang membawakan unsur-unsur muzik tersebut dan imej muzik mereka yang tidak dibenarkan? Atau hanya muzik yang berunsurkan ketuhanan sahaja yang dibenarkan?
Lagu-lagu ketuhanan banyak dikaitkan dengan muzik ala nasyid dan bila terdengar muzik ala nasyid kita terbayangkan penggunaan alat muzik gendang yang menyerlah, kedengaran seperti muzik dari padang pasir. Di Indonesia, sebuah kumpulan muzik pop, Ungu, berjaya menambat hari ramai dengan lagu ketuhanan mereka, Andai Ku Tahu. Di Amerika, Native Deen, yang terdiri dari beberapa orang kulit hitam yang beragama Islam merombak muzik jenis hip-hip r&b untuk menyampaikan dakwah Islam. Ini adalah muzik citarasa masyarakat Amerika, yang rata-ratanya pemuda dan pemudi. Harus di ingatkan juga di Amerika juga ada aliran jenis muzik ‘Christian Rock’ yang juga artisnya itu juga terkenal di Malaysia.

Di Malaysia pula, Akademi Nasyid melahirkan idea-idea baru tentang muzik berunsurkan Islam. Di peringkat akhir siri tv realiti tersebut membariskan pemuzik handalan sebagai tunjang belakang muzik di samping kretiviti peserta pertandingan. Ada juga yang bernasyid dengan menggunakan gitar dan mereka mempunyai kepandaian untuk melakarkan melodi menggunakan suara dengan teknik-teknik yang terbaik, dengan harapan untuk menjuarai Akademi Nasyid tersebut.
Kehadiran Ramli Sarip dengan lagu Perjalanan Hidup cukup menghiburkan. Sebuah lagu yang sedap menceritakan tentang kehidupan di muka bumi Tuhan. Menambat ramai orang-orang termasuk dewasa.
Apa yang dikatakan oleh Dr Ismail Salleh adalah sesuatu yang tidak dapat ditakrifkan secara tepat dan membingungkan ramai pihak dan artis sendiri. Bagaimana jika artis itu membawakan muzik yang tidak kedengaran seperti muzik Nasyid padang pasir, tetapi berunsurkan ketuhanan disamping campuran kretiviti dari pelbagai jenis muzik supaya ianya sedap didengar oleh semua. Muzik yang sedap didengar pasti akan menambat ramai.
Kumpulan Raihan muncul dan berjaya menawan ramai kanak-kanak, tetapi orang dewasa juga perlukan sentuhan muzik untuk kita sampaikan apa yang sepatutnya disampaikan mengikut tahap kedewasaan mereka, dan jika kita ingin menjaga moral para remaja kita, harus juga kita menggunakan muzik yang menjadi citarasa remaja masakini. Sedangkan muzik yang tergolong dalam muzik pop dan rock tidak dibenarkan langsung di Kedah dan kita telah membuang jenis muzik yang diminati remaja. Di Kedah, konsert rock juga telah lama tidak ada. Bukan hanya setelah apabila kerajaan PAS mengambil alih, dan pastinya dari dahulu juga gejala sosial telah ada di Kedah.
Peraturan yang ditetapkan JAKIM dalam pertandingan Nasyid kebangsaan sendiri seharusnya di pertimbangkan demi mewujudkan satu jawatan kuasa yang lebih terbuka dalam menilai satu-satu artis yang membawakan muzik-muzik mereka. Dari peraturan tersebut tercatit nasyid tradisi bermaksud lagu yang mengandungi unsur-unsur antaranya bayati, nahwan, sikah, ras, sobah, hijaz dan lagu nasyid moden ialah lagu selain daripada lagu tradisi tetapi hendaklah tidak termasuk rentak seperti rock, heavy metal, jazz, hip hop dan rap. Sedangkan rentak seperti jazz, hip hop dan rap adalah muzik kegemaran remaja masakini. Jika rentak ini dibawakan dengan mesej ketuhanan pasti dapat menarik remaja untuk mendengar dan menghayati lirik-lirik di dalam lagu tersebut. Bukankah ini secara logiknya kita fahami dapat mengawal gejala sosial dan keruntuhan moral.
Lagu Malique berduet dengan M Nasir, Mentera Beradu amat tepat dengan citarasa remaja. Lagu Alhamdulillah dari Too Phat juga. Tetapi ini bukan dalam kategori Nasyid Moden kerana terdapat unsur-unsur rap dan hip hop. Lagu ketuhanan, Andai Ku Tahu, dari kumpulan Ungu tidak dikira Nasyid Moden, kerana terdapat unsur pop.
Membuat lirik ketuhanan itu memerlukan keikhlasan dari pencipta. Dan untuk memenangi pertandingan ini gubahan lagu harus di ambil kira oleh peserta dan kretiviti mereka terbatas dengan peraturan jenis muzik. Tetapi jika unsur-unsur pop dan jazz di gunakan pasti dapat menambat ramai untuk mendengar lagu-lagu ketuhanan. Kretiviti peserta untuk menyampaikan mesej cintakan Tuhan dan Islam juga adalah utama. Jika semua ini diambil perhatian oleh Dr Ismail, pasti ramai anak-anak muda di Kedah ini yang lebih berkeyakinan untuk tidak membuat aktiviti membuang masa
seperti merempit dan maksiat. Semoga kita kearah kebaikan.


Read more: http://ilhamnurulresources.blogspot.com/#ixzz1Ebv7Aw16

Wednesday, February 9, 2011

SOUND SYSTEM KHAS UNTUK MASJID

Sound system untuk masjid tentunya tidak sama untuk kegunaan di padang atau di rumah kenduri. Sound system di masjid tentunya perlu lebih sesuai kerana ia sepenuhnya bergantung kepada kemerduan suara imam semata-mata tanpa iringan alunan muzik, penyanyi latar dan sebagainya. Apabila solat di Masjid Nabawi atau Masjidil Haram, terasa sentuhan suara imam terus masuk ke telinga dan bergelombang dalam minda dan ruh jemaah.

Di mana-mana masjid di Malaysia, kita dapati sound system sentiasa bermasalah. Tidak ramai yang tahu menggunakan (mengendalikan) PA system yang dibekalkan. Biarpun kosnya amat tinggi, tetapi teknologi canggih tidak boleh digunakan sebaiknya kerana kemahiran kepenggunaan tiada (atau amat terbatas). Perkara ini perlu diberi penekanan kepada kita, khasnya kepada imam dan bilal yang sering kali berurusan dengan PA System.

Tiba masanya kita perlu sediakan latihan pengendalian PA system kepada imam dan bilal agar mereka sendiri tahu bagaimana hendak menggunakannya dengan baik..


Untuk khidmat konsultansi tentang sistem dan cara pengendalian yang bersesuaian sila hubungi
Mr.Pojie 017-6477528.

Read more: http://ilhamnurulresources.blogspot.com/#ixzz1DPbrbIlw

Friday, January 28, 2011

Home Recording Basic


WOULDN'T IT BE GREAT TO BUILD YOUR OWN HOME RECORDING STUDIO?

AS A MUSICIAN, CHANCES ARE AT SOME POINT YOU'VE WONDERED ABOUT THE POSSIBILITY OF RECORDING YOUR MUSIC.
WHETHER IT'S FOR A DEMO, TO SHARE WITH FRIENDS, OR SIMPLY FOR THE THRILL OF HEARING YOURSELF PERFORM, AT LEAST ADMIT TO YOURSELF THAT THE IDEA OF RECORDING YOUR MUSICAL PERFORMANCES IS INTRIGUING.
THE PROBLEM IS THAT IT'S AN INTIMIDATING HOBBY TO GET STARTED IN. BETWEEN THE HEAVY DOSES OF IMPRESSIVE SOUNDING JARGON AND THE INTERACTION OF ALL THE MANY DIFFERENT COMPONENTS, IT'S EASY TO BE DISCOURAGED.

my home studio
LIKE YOU I WANTED TO MAKE MY OWN AUDIO RECORDINGS, BUT NEEDED SOME ADVICE ON WHAT I NEEDED TO GET STARTED. I WANT TO HELP YOU WITH SOME OF THE THINGS I'VE LEARNED AS I CREATED MY OWN HOME RECORDING STUDIO.
I'LL EXPLAIN THE BASICS OF EACH STEP ALONG THE WAY. TOGETHER WE'LL CREATE A BASIC HOME RECORDING SETUP THAT'S RIGHT FOR YOU.
ALL YOU NEED IS A PASSION FOR MUSIC, SOME BASIC RECORDING EQUIPMENT, AND A WILLINGNESS TO LEARN.
MUSICIANS -- FROM SMOOTH FINGER-PICKERS & ELECTRIC BLUES-LICKERS TO 80S METAL FACE MELTERS... ONE THING UNITES US ALL. THE DESIRE TO EXPRESS EMOTION THROUGH THE EXPERIENCE OF SOUND.
FOR ALL OF OUR WORDS AND EXPRESSIONS, THEY OFTEN PROVE TO BE INADEQUATE WHEN COMPARED TO THE ELEGANCE OF MUSIC.
YOU HAVE A SYMPHONY INSIDE, READY TO BE UNLEASHED.


BASIC STUDIO BUILDER


The Basic Studio Builder will be your step by step guide to creating your very own Basic Home Recording Studio. Your home recording studio will be a collection of various pieces of hardware and software. The beauty is that it will be custom made for your needs.
Each step in the Basic Studio Builder will describe a different aspect of the home studio. For more information on any step click on the hyperlinks within or check the navigation sidebar.


Following each description will be a 'Basic Studio Builder Rating' to recommend how much of your budget to dedicate to the gear in that section. Here is the definition of each rating:
$ - A good place to save some money.
$$ - Spend a bit more and buy some additional quality.
$$$ - Splurge here knowing that you'll be happier in the long run.
This basic setup will get you started with the least amount of gear and equipment. If you're not quite sure if you want to make an investment in this hobby yet, then this is the place to start.
Still feeling anxious about getting started? Maybe an overall explanation of Recording Basis will help put your mind at ease. After all, this is supposed to be fun!
Now it's time to kick the tires and light the fires. Yeeehaw!!

Choose a Location


We start with choosing a location for your home studio. The location is important because this will be your sanctuary, your shelter from the storm of your everyday life.
This should be a place where you can be reasonably isolated. I would recommend using a spare bedroom or office as a dedicated space.
Try to setup your studio in a separate part of your home if possible, rather than double booking a current room (i.e. your bedroom or living room), so that you can focus on your music free from distraction.
A basement area would be ideal since you will be able to eliminate some of the ambient noises of the neighborhood around you.
Most importantly, choose a location where you feel comfortable and can let your creativity freely flow.

Get Furnished


Having a smart layout makes all the difference in the world.All of your gear should be laid out so you can enter the room and get right to work.
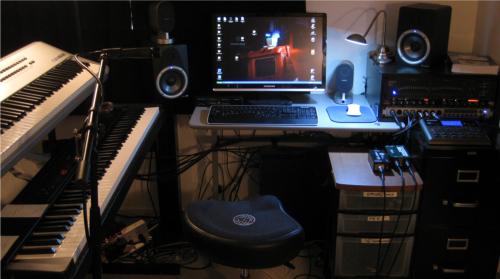
Nothing will scare off a great idea faster than searching for cables, mics, FX pedals, tuners, etc.Musical inspiration is delicate like a house of cards... one false move and it all falls down. It's also be like playing Jenga while drinking.
The analogy depends on if you like making card houses or drinking. In any event...
Have your gear organized and close to you. Get some easy to reach storage containers with drawers to keep all your loose accessories and spares together in one place.
Buy enough furniture so that everything has its own dedicated space and isn't piggybacked on another piece of gear... even something you don't use.
If at any point you find that you are not using something regularly...


Get Rid Of It From Your Setup!

Don't throw it out on the street, but store it away so that it's not a constant distraction. Simplify your studio and simplify your life.
Later when you have your gear ready to go, spend some time doing a "day-in-the-life" of your setup before running cables and cords. In other words, sit down and physically go through the motions of what you would do during a session.

For example, you sit down, grab your guitar, position a mic for vocals. Lay out your hardware so that cables don't overlap and get mixed up. All of your gear should be readily accessible without resulting in a tangled nightmare.
Get stands for your monitors, get stands for your mics, get stands for your guitars and keyboards, surge protectors with plenty of inputs.
This is a good place to spend some scratch... a bad layout will crush your creativity and your desire to spend time in your studio.
You don't need fancy professional custom studio furniture, but you do need to make sure it's all laid out nicely.


Choosing an Audio Interface


The Audio Interface is what bridges the gap between your music and the digital recording world in your home studio.
Although there are other options to choose from, the Audio Interface is the most straight-forward solution.
The main advantage of an Audio Interface is that you get your analog-to-digital converters, mic preamps, MIDI interface, and phantom power supply all in one unit.
Another great feature is that they connect to your computer via FireWire or USB interface, so you can have it in an easy to reach spot.
The decision of which AI you choose will largely come down to the number of mic preamp inputs you'll need. Are you gonna be a solo act with one vocal mic and one mic for your acoustic? - that's 2 right away.
If your lead guitar guy comes over to jam he'll probably want to mic his vocals as well plus plug in his electric axe to lay down some filthy epic riffs - that's 2 more.
And those are just the mono inputs - stereo inputs (such as those from a digital piano or synth) will use them up twice as fast.
They add up in a hurry so think this out for a bit. Try to have some foresight for expansion down the road. Having a few extra inputs can help avoid the headache of owning a piece of gear that can't do what you want.
You know that saying "Less is More"?? We'll in this case "More is More".
Check out the dedicated page for Audio interfaces for a more in-depth discussion. If you are ready to pull the trigger on an Audio Interface, check out the Audio Interface Buying Guide to compare several popular models.
As mentioned above, your Audio Interface will connect directly into your Digital Audio Workstation, so make sure the interface type (FireWire / USB) is supported by your machine.


The Digital Audio Workstation


It's time to put that computer of yours to good use there, Champ. Here is where we describe your Digital Audio Workstation (or DAW).

Although 'Digital Audio Workstation' is a generic term that could describe a wide range of equipment, for our purposes it is simply your home computer complete with digital audio Recording Software.

This software allows you to manage the different audio and digital signals received by your computer, and can either be purchased by itself or bundled with an Audio Interface.Often the software included is more than sufficient to get your feet wet and decide if this is something that you'd want to make a more significant investment in.
As you've seen with other software applications, having only the minimum requirements will make you want to set your machine on fire and toss it into oncoming traffic.
Avoid this by upgrading your current machine or going for a newer model. Check out the Digital audio Workstation page for more info.
Remember, there are 10 types of people in the world... those that understand binary - and those that don't.


Selecting Microphones


The importance of the microphone in the home studio can't be understated. After all it is the gateway into your realm of home recording.This is a good place to buy a quality, durable piece of equipment. But don't go overboard because these things can also get crazy expensive.
Depending on what you're recording, there are a couple different Microphone options. A high-end model will collect every nuance, but without the proper room acoustics, equally high-end preamps, and other components you won't hear the difference... so these are no good to us.
For around $150 bucks you can get a quality condenser mic. Since this is just to get started, I'd recommend a condenser over a dynamic mic.
A condenser mic will give you the flexibility to do vocals and instrument recording... just make sure you have Phantom power!


Recording Direct


Another giant savings in your basic home studio setup is the ability to record your instruments direct... or without the use of amplifiers.To do this you will need the services of a Direct Box. This takes a high impedance instrument level signal as an input and outputs a balanced mic level signal.
So for example, you would be able to plug your guitar into a Direct Box then (ready for this?) put it directly into your mic preamp input on your mixer or audio interface. Click above for a more in-depth explanation.
I use these all over my home setup: from my electric guitar, from my vocalist live FX pedal, and even from my digital piano.
Giving the Audio Interface / Mixer the signal type it is expecting will help reduce unwanted noise and make recording your instruments a breeze.


The Studio Cable Connection


Now that the difficult decisions have been made, it's time to hook everything together so that the precious audio data can be delivered right where it needs to be.Check out the Studio Cable guide for more information on how to get just the right tools for the job.
Since we are not trying to buy gear for life "on the road" we can actually save money on cables. You'll need a lot of these (plus spares) so they could potentially eat up a lot of the budget.
How much you spend on these will depend on your tolerance for replacing worn out parts. If you are handy with a soldering iron, then you may not have a problem ever.
Otherwise if you don't want to be bothered, then it may be worth it to you to spend more and get a lifetime warranty.


Bringing it All Together


Now that you have all the gear and cables that you need... the next question is how does everything fit together.
Just like a sadistic jigsaw puzzle, getting all your equipment put together correctly can be a daunting task.
After all, there are no instructions for your unique setup right??
Well... not so fast.
Even though there are many many possibilities, chances are that your setup will fall into a few categories depending on what pieces of gear you have chosen for your studio.
Check out these Setup Diagrams to get some guidance on putting it all together. I know that between these examples and the knowledge you've gained along the way you'll be able to get you studio up and ready to rock.
Now all that's left if for you to start laying down those grooves, tunes, riffs, and licks that you've been keeping locked up inside all these years.

Victory Dance


Congratulations! Go ahead and do a little shimmy in your chair.At this point you should have the gear and knowledge you need to share your creativity with the world. There's no substitute for spending time and getting accustomed to your new studio gear.
Enjoy the journey of learning and discovery. If you are ready to add some more flexibility and capability to your rig, check out this site regularly.
Welcome to the world of digital home recording.


We are the music makers. And we are the dreamers of dreams...